Currently Empty: €0.00


A beginners guide to Grow Kits
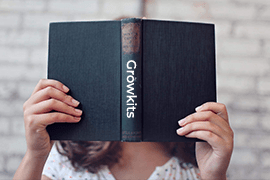
Growkits
Our Easy growkits are, as the name already suggests, easy and straightforward to use. The package will include everything you need minus the patience.
Each kit holds a layer of perlite for holding water, a layer of mycelium for mushroom growth and a layer of vermiculite for climate control. Smushing all these things together and you have a miniature greenhouse that is ideal for growing your psilocybin mushrooms.
Something important to note is that mushrooms are sensitive little buggers and can get contaminated easily with touch. We advise you to wash your hands before handling the grow kit and make sure your green thumbs are sterile. Dont breath into the grow bag either as this increases the risk of contamination even more.
So having said that, let’s look at what you will receive when ordering a grow kit with us.
- 1 Grow kit with all the layers needed to grow the product
- 1 Grow bag
- 2 Paper Clips
Things not included but needed to grow the shrooms are: Clean Water (Tap or bottled) Warm bright place (not in direct sunlight)
The Process
The whole process should not take longer than 3 weeks, so patience is key. These kits are also made to kind of work on autopilot, so don’t interfere the cultivation process by opening the bag prematurely to check on the mushrooms. This just increases the risks of contamination and could spell disaster for your small colony. Follow the instructions below and you should have your own mushroom city before you know it.
There is a possibility that the mycelium has not fully grown into the casing-layer. Should that be the case, place the grow kit in a warm place, around 26 degrees Celsius, until you see the mycelium growing above the surface. You can proceed with the following steps once you notice a snowy white layer in your growkit.

Step 1
First you need to make sure you are wearing gloves or washed your hands before handling your growkit to avoid contamination.

Step 2
Once your done you can grab the bag that came with the kit and open it up carefully without touching the insides to much. Gently poor 200 ml of clean water into the bag to ensure the humidity levels stay high.

Step 3
Gently remove the lid on your growkit and place it inside the plastic bag without splashing the water onto the cake.

Step 4
Fold the top of the plastic bag twice and secure it with paperclips. Keep the bag in a place that has enough light (No direct sunlight) and has an ambient temperature of 23 degrees Celsius.

Step 5
After 3 days, cut 2 holes the size of an one euro coin on each side of the bag and wait another 6 – 10 days.

Step 6
After 6 – 10 days you should start seeing buds forming on the surface of your kit. If so, you can start misting your growkit every other day to make sure it stays moist. Just make sure you don’t spray directly onto the cake to avoid water puddles building up as this increases the chance of contamination greatly. Wait another few days.

Step 7
After having waited a few days, the mushrooms should have matured enough to be harvested. To harvest your mushrooms properly, you need to gently grab them by the base near the ground and lift them up gently with a twisting motion. This method will ensure your casing layer does not get damaged and you can attempt another 2 flushes after this harvest.